I had tried everything—face washes, expensive serums, even visited a skin doctor. Nothing gave me lasting results. My acne kept coming back, and my skin looked dull and tired.
Some days, I didn’t even feel like looking in the mirror. I covered up with makeup, but I knew it was just hiding the problem.
Then one evening, I was scrolling through natural skincare videos. I saw someone sharing a 10-day home remedy routine. It looked simple and affordable. I thought, “Why not try it? I’ve got nothing to lose.”

I followed the routine every day—just 15 to 20 minutes daily. No fancy products. Only ingredients from my kitchen.
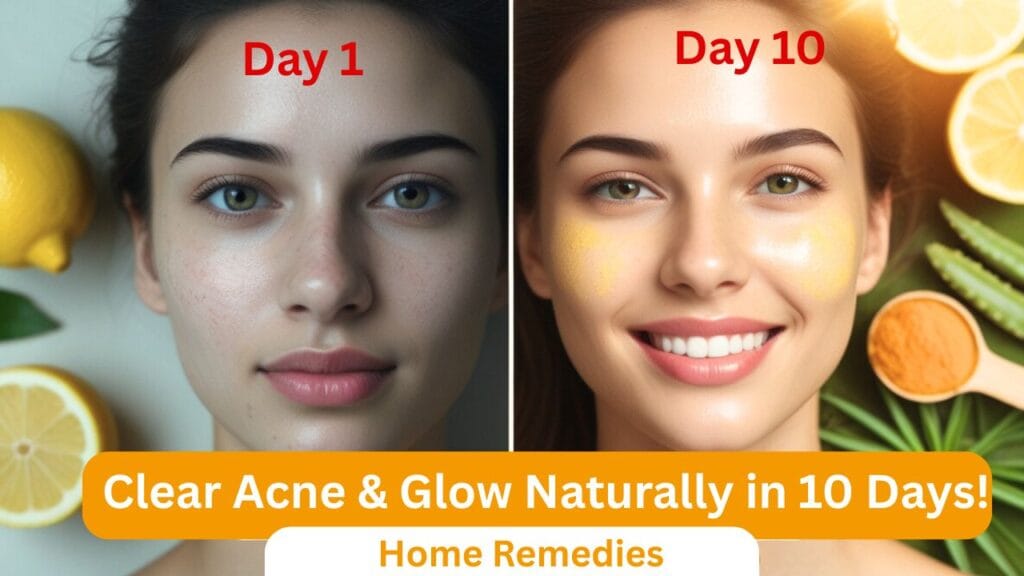
And guess what? By Day 10, my skin was clearer, smoother, and had a natural glow. Even my friends started asking what I was using!
In this post, I’ll share exactly what I did—step by step—so you can try it too. No filters. No expensive products. Just pure, honest skin care.

Ready for the glow-up? Let’s begin!
Before the Glow-Up: Understanding the Problem 🔬
Before I found what worked, I had no idea why my skin was breaking out so much.
I used to wash my face again and again, thinking it would remove the oil. But my skin just got more dry and irritated.
Later I learned that too much oil, stress, lack of sleep, and eating junk food were all hurting my skin. Even the dust and pollution from outside made things worse.
I thought expensive creams would fix it. But most of them had strong chemicals. They worked for a few days, then my skin broke out even more.
My skin felt tired and rough. It lost its natural glow. I didn’t feel confident.
That’s when I made a decision.
I told myself — “Enough is enough. I’m going natural.”
No more harsh products. I started using simple home ingredients — things I already had in my kitchen.
And that small change made a big difference.
The 10-Day Natural Skincare Routine 📆
This routine is very simple. I didn’t spend hours doing skincare. Just 15–20 minutes a day — morning, afternoon, and night. And it actually felt like self-care.
I used only natural things — no fancy creams, no harsh chemicals.
Let’s break it down day by day 👇
Morning Routine (Start Your Day Fresh)
Every morning, I followed this:
- 1 glass of warm water + a few drops of lemon + honey (Detox drink)
- Wash face with plain water or gentle cleanser
- Apply a natural face pack (takes 10 mins)
Morning Face Pack (You can choose one):
Option 1:
- 1 spoon Multani mitti
- ½ spoon neem powder (or crushed neem leaves)
- Rose water (make a paste)
Option 2:
- 1 spoon besan (gram flour)
- A pinch of turmeric
- 1 spoon curd
- Few drops of lemon
Apply any one of these. Keep it on for 10–15 minutes. Wash off with water. Pat dry.
Afternoon Mini Glow Boost (Tomato or Potato Rub)
- This step is so easy, I did it while watching TV!
- Cut a tomato or potato slice.
- Rub it gently on your face for 5 minutes.
- Leave the juice for 10 minutes, then rinse.
- Tomato helps reduce pimples and tan. Potato fades acne marks. It’s magic!
Night Routine (Repair While You Sleep)
- Wash face gently with cold water or mild cleanser
- Take steam (optional, just 3–5 mins over hot water)
- Apply aloe vera gel or tea tree gel (leave overnight)
- Sometimes, I mixed 1 drop of tea tree oil with aloe vera gel — perfect for calming my skin overnight.
- That’s it! Just follow this routine for 10 days. I saw a big difference by Day 4 — less oil, fewer breakouts, and a smooth feeling.
DIY Face Pack Recipes 🥣 Easy & Natural
During my 10-day routine, I used 3 homemade face packs. They were super easy to make and gave real results.
I didn’t buy anything fancy — just used kitchen and garden ingredients.
Here are my top 3 favorites:
Pack #1: Neem + Multani Mitti + Rosewater (Anti-Acne)
What you need:
- 1 tablespoon multani mitti (fuller’s earth)
- ½ tablespoon neem powder (or crushed neem leaves)
- Rosewater — enough to make a smooth paste
How to use:
- Mix all the ingredients in a small bowl.
- Apply the paste to your face, especially where you have pimples.
- Leave it for 15 minutes.
- Wash with cold water.
Best for: Oily and acne-prone skin.
Benefits: Neem kills acne-causing bacteria. Multani mitti removes excess oil and tightens pores. Rosewater keeps skin fresh and calm.
Pack #2: Gram Flour + Turmeric + Curd + Lemon (Glow Booster)
What you need:
- 1 tablespoon gram flour (besan)
- A pinch of turmeric
- 1 tablespoon curd
- Few drops of lemon juice
How to use:
- Mix everything well into a smooth paste.
- Apply on your face and neck.
- Leave for 10–12 minutes.
- Wash gently with lukewarm water.
Best for: All skin types (Avoid lemon if you have very sensitive skin)
Benefits: This pack removes tan, brightens dull skin, and gives a soft glow. Turmeric fights bacteria, curd moisturizes, and besan gently cleans.
Pack #3: Aloe Vera + Honey + Rice Flour (Gentle Scrub)
What you need:
- 1 tablespoon aloe vera gel (fresh or pure store-bought)
- ½ tablespoon honey
- 1 tablespoon rice flour
How to use:
- Mix it into a light, scrub-like paste.
- Apply to your face and gently massage in circles.
- Leave for 5 minutes like a mask.
- Rinse off with water.
- Best for: Dry, sensitive, or rough skin
Benefits: It exfoliates gently, removes dead skin, and gives instant smoothness. Aloe heals, honey hydrates, and rice flour scrubs without damage.
Pro Tip: Use one pack per day — no need to mix all. Just listen to your skin. I used Pack #1 more when I had breakouts, Pack #2 for brightness, and Pack #3 when my skin felt dry.
The Skin-Glowing Diet I Followed 🥗 From Inside Out
Good skin is not just about what you put on your face. It also comes from what you eat.
During these 10 days, I paid attention to my diet. I didn’t go on any crazy diet, just made some smart food swaps.
Here’s what I ate to help my skin glow:
- Cucumber: Lots of water and vitamins, great for hydration and cooling the skin.
- Papaya: Helps remove dead skin and brightens the face naturally.
- Green Tea: Full of antioxidants, it fights skin damage and reduces inflammation.
- Almonds: A small handful a day gives you vitamin E, which is great for skin repair.
At the same time, I avoided some foods that can make acne worse:
- Dairy products: Milk and cheese sometimes cause breakouts for me.
- Sugar: Too much sweets can cause inflammation and dull skin.
- Fried and oily foods: They increase oil production and clog pores.
Remember, I didn’t become perfect overnight. I just made these easy swaps. Drinking more water and eating fresh fruits helped a lot too!
The best part? These changes felt natural and easy, not like a punishment.
Results: What I Noticed Each Day 📈
I was excited to see changes every day. Here’s how my skin improved during the 10 days:
Day 1 to 3:
My skin felt less oily. The redness and irritation from pimples started to calm down. It didn’t feel tight or dry like before.
Day 4 to 6:
I noticed my skin texture becoming smoother. Some of the small breakouts started to disappear. My face felt softer and more even.
Day 7 to 10:
This was the best part — my skin began to glow naturally. The acne marks and dark spots started fading. I felt more confident without makeup.
I didn’t use any harsh chemicals, just natural ingredients and simple care. The slow and steady progress made me trust the process.
If you stick to it, you will see the glow too!
Bonus Tips That Boosted My Results 💡 Game-Changers
Along with my 10-day routine, these small habits helped a lot:
Clean Pillowcases:
I changed my pillowcases every 2–3 days. Dirty pillowcases can carry bacteria that cause breakouts. Clean ones kept my skin fresh.
Ice Massage After Steaming:
After steaming my face, I gently massaged ice cubes on my skin. It reduced redness and closed my pores. It felt so refreshing!
Drinking More Water:
I made sure to drink at least 8 glasses of water daily. Hydrated skin glows and heals faster.
Avoid Touching Face:
I stopped touching my face often. Our hands have germs that can worsen acne. This simple change helped reduce new pimples.
Getting 7–8 Hours of Sleep:
Good sleep gave my skin time to repair itself. I felt less stressed and my skin looked brighter.
These tips made a big difference. They are easy to follow and super helpful for healthy skin.
Download “Clear Acne & Glow Naturally in 10 Days” Clear-Acne-Glow-Naturally-in-10-Days.pdf – Downloaded 194 times – 286.39 KBFAQ: Your Questions About the 10-Day Natural Skincare Routine
Q1: Can I use this routine if I have sensitive skin?
Yes! This routine uses gentle, natural ingredients. But if you have very sensitive skin, do a patch test first. Avoid lemon if it feels too strong, and use aloe vera or honey for extra soothing.
Q2: Will this work for teenage acne or adult acne?
Absolutely! The routine helps reduce oil, calm inflammation, and brighten skin, which benefits both teenage and adult acne.
Q3: What if I miss a day?
Don’t worry! Missing one day won’t ruin your progress. Just get back to the routine the next day. Consistency is key, but be kind to yourself.
Q4: Can I continue this routine after 10 days?
Yes, you can! Many people use these natural remedies regularly to maintain clear and glowing skin. Just listen to your skin and adjust as needed.
Conclusion: You Don’t Need Expensive Skincare 💬
After 10 days, my skin looked clearer, brighter, and healthier. The best part? I didn’t spend a lot of money or use harsh products. Just natural ingredients and a little care made all the difference.
If you’re tired of wasting money on expensive creams that don’t work, give this simple routine a try. It’s easy, affordable, and kind to your skin.
I didn’t just fix my skin—I got my confidence back. And you can too!
Have you tried natural skincare before? Or do you have questions about this routine? Drop a comment below—I’d love to hear from you!
If you want, I can share a free printable 10-day skincare plan to help you stay on track.
Want this plan as a printable tracker? Drop a 💧 in the comments!


